Upper Body & Head
Shoulders, chest, neck, and head — releasing the patterns of forward posture.
Shoulders & Chest
The shoulders and upper arms tend to be internally rotated, which comes with shortened pectoral muscles. Because of hunching in the upper back and this internal rotation, the chest tends to drop inferior. We can use the clavicles as a landmark: in a healthy position they should be nearly horizontal; with poor posture they compress medially and drop inferiorly.


.png)
Manual Release
Fingers Pec Minor & Coracoid Process
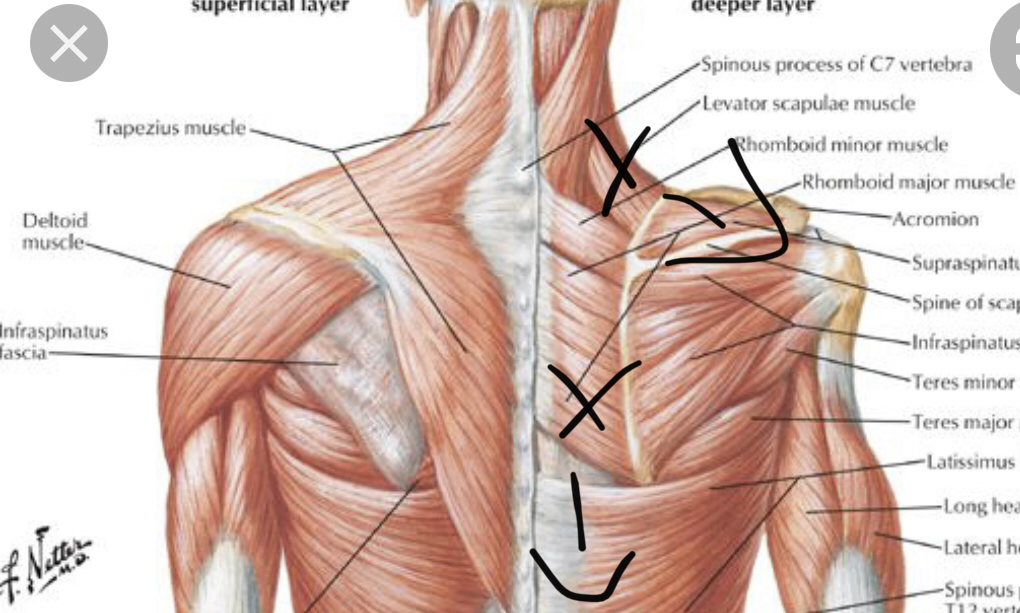
The pec minor runs diagonally — its origin is medial and superior (near the sternum), and it attaches to the coracoid process: a bony protuberance on the front of the shoulder. The coracoid attachment, along with other attachments on the humerus, gets pulled medially and inferiorly into internal rotation.
- 1Find the coracoid process — it's just below the collarbone, about 1–2 inches medial to the front of the shoulder. Press in from below the clavicle and you'll find a small bony point.
- 2Slowly sink your fingers into the soft tissue around this point. Take your time exploring the attachment sites.
- 3Use the diagonal direction of the pec minor as your cue: draw the tissue superiorly and laterally — opening the chest and shoulder into external rotation.
- 4Explore medially along the chest, working the pec minor fibers from the coracoid back toward the sternum.
Everything in the shoulder wants to go superior, lateral, and posterior — lifting up and opening outward, reversing the internal rotation pattern.
Neck & Head
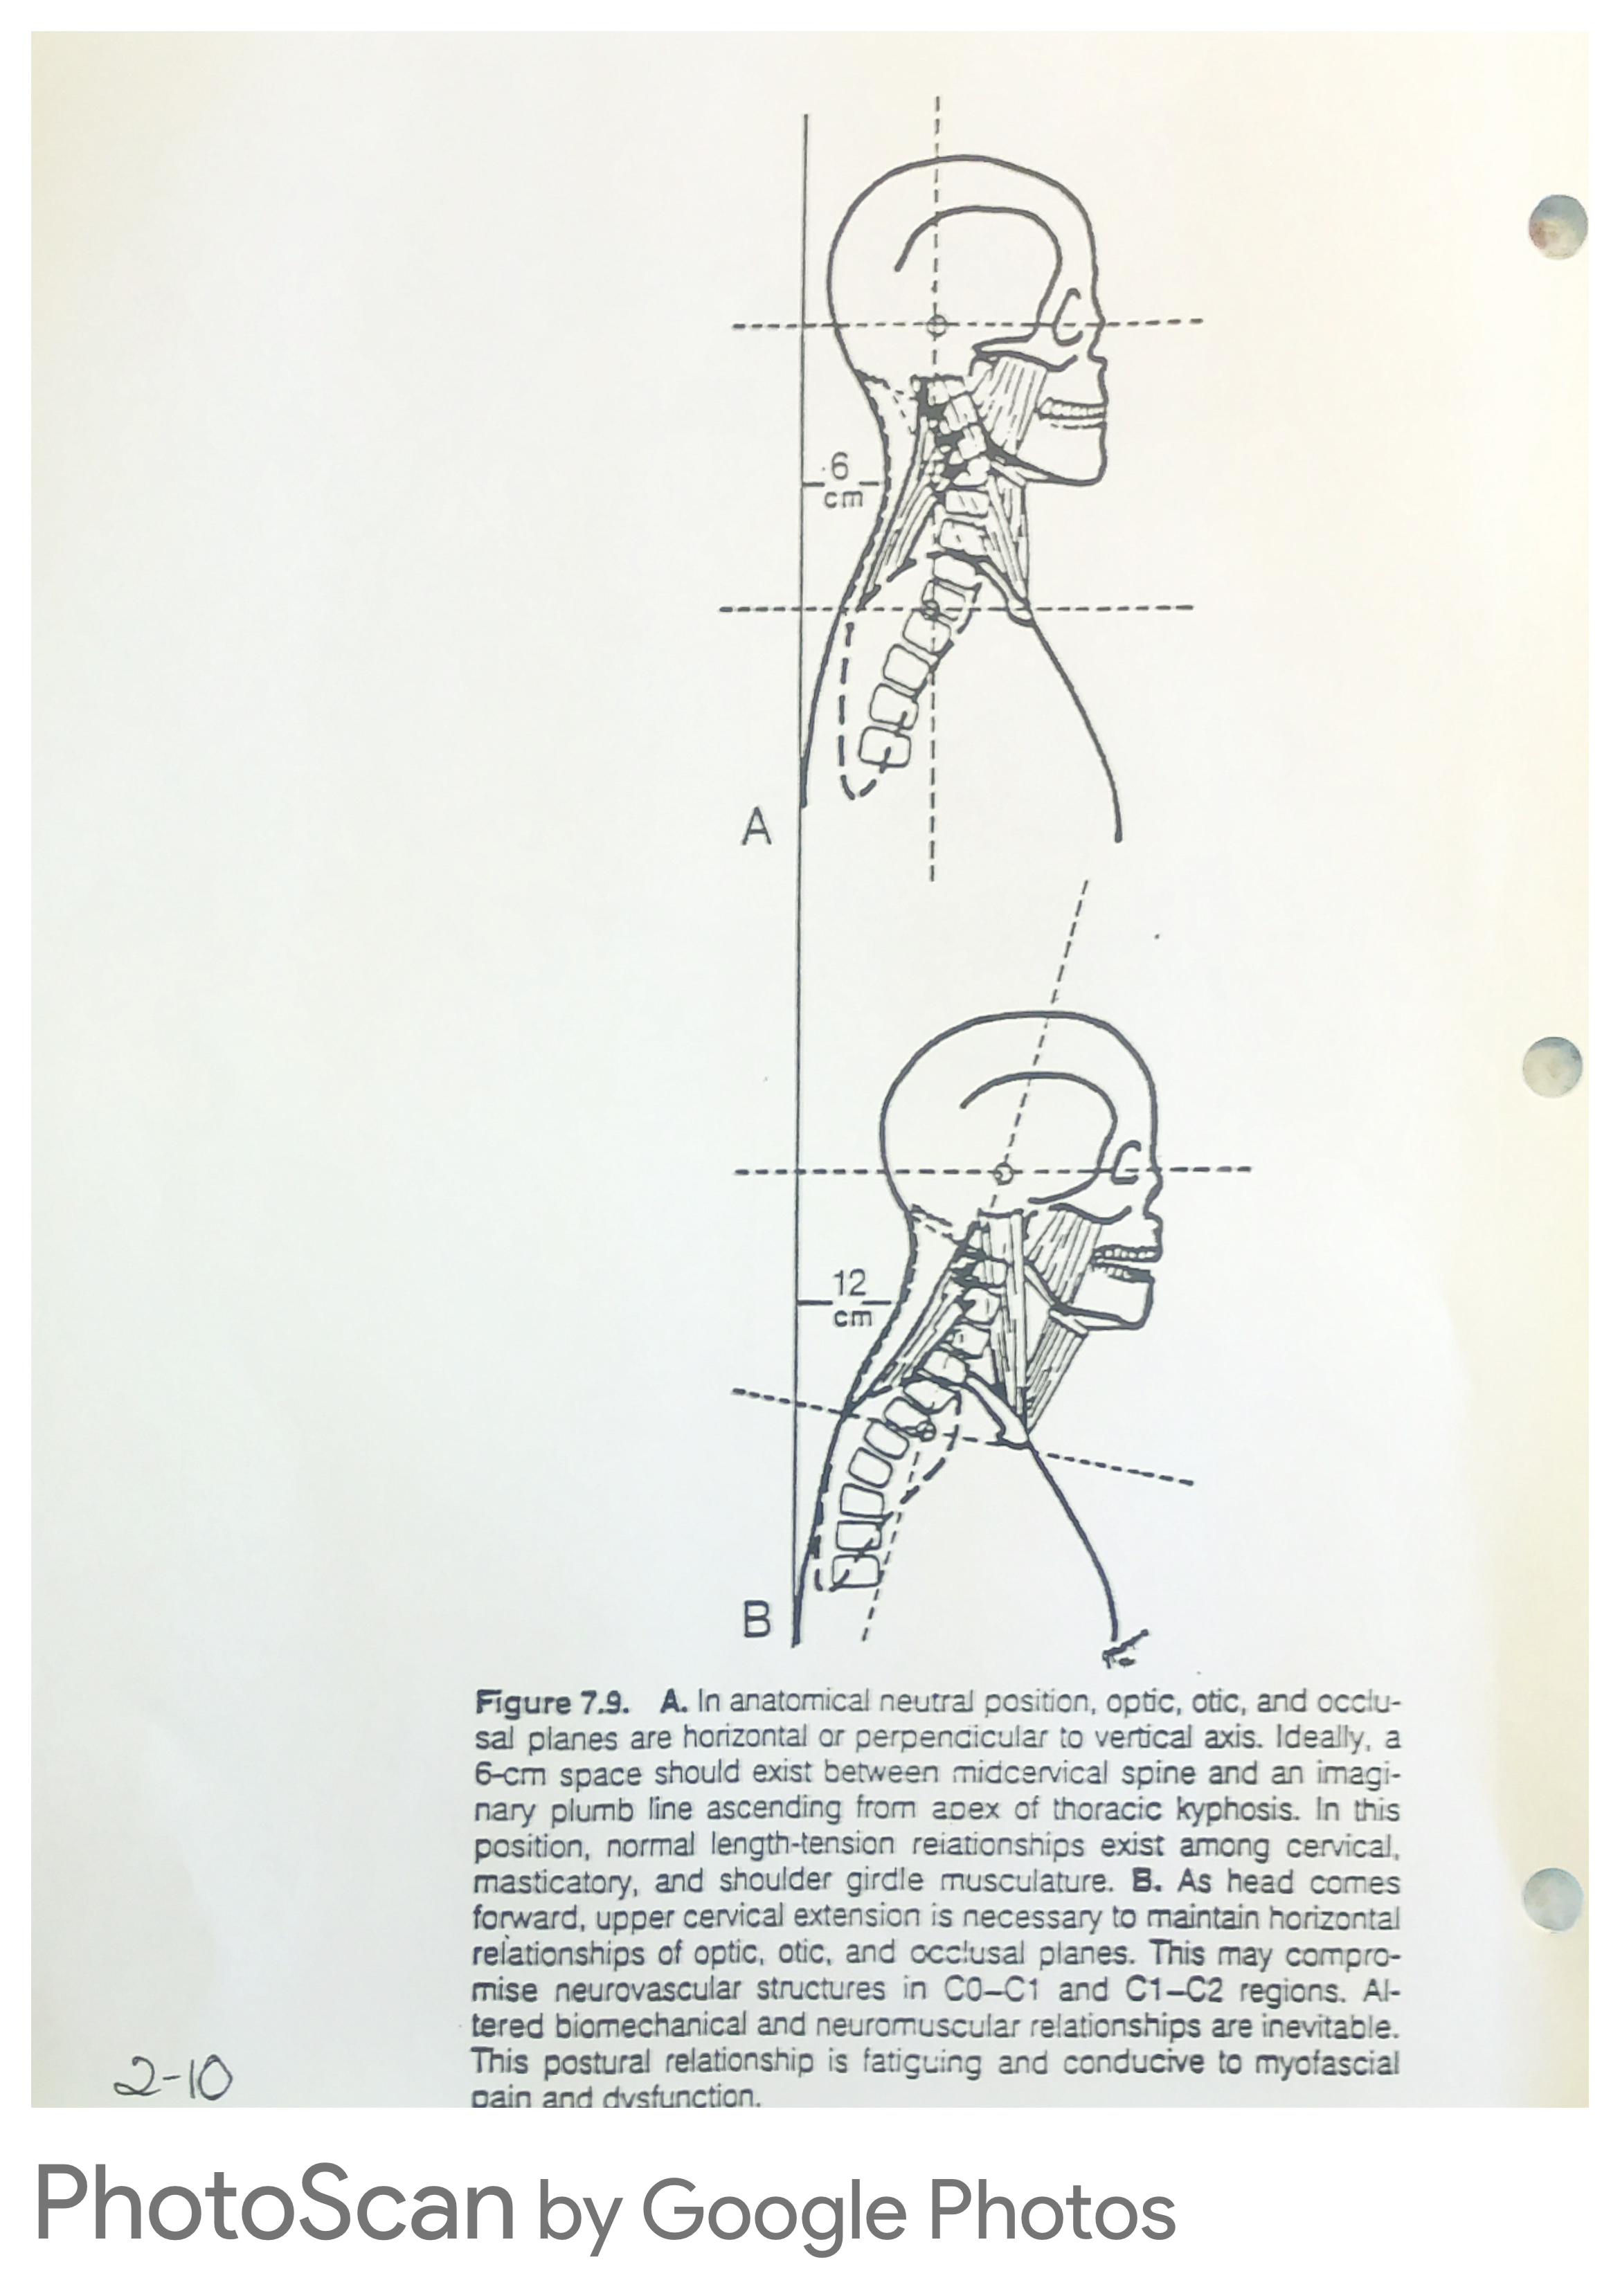
Forward Head Posture (FHP) is the central pattern of neck and head dysfunction. It occurs when the chest and clavicle line drop into a hunch — the head reflexively thrusts forward to keep the eyes level with the horizon. For every inch the head moves forward from neutral, the gravitational load on the neck increases by approximately 10 pounds.
Additionally, fascial restrictions build up at the base of the skull (occiput), which can restrict blood flow and even the circulation of cerebrospinal fluid. The anterior neck muscles become weakened from chronic overlengthening, while the posterior muscles stay overactive and tight.


.png)
.png)
.png)
The "Push the Dime" Correction
This simple technique repositions the head into neutral alignment. Use it throughout the day whenever you notice your jaw has jutted forward.
- 1Locate the landmark: Find the small bump at the exact center-back of your skull.
- 2Set the dime: Imagine a dime resting between that point on your skull and an imaginary vertical plane just behind your head.
- 3Trap the dime: Glide your head straight back (without tilting) to press the dime against the plane.
- 4Tuck the chin: Gently tuck your chin downward — this pushes the imaginary dime upward along the plane. Your head is now in neutral.
You don't need to hold this position exhaustively. Simply notice when your jaw has drifted forward, make the correction, then relax. Over time, neutral becomes the default. Perform reps of the correction to strengthen the deep anterior neck flexors.